Magnetic snaps are a handy fastener solution for a variety of accessories and even apparel. The process of attaching them is pretty easy, as you’ll see here. You basically mark the position, cut the slits for the prongs, mount the pieces and then fold the prongs down. You’re done! As with most sewing techniques, there are some tips and secrets to ensure that your finished project wears well. Want to know what they are?
In addition to magnetic snaps and your project, you’ll need these tools on-hand:
1. Sharp scissors
2. Pliers
3.Marking pen or pencil
4.Iron-on interfacing
5.Small piece of cardboard
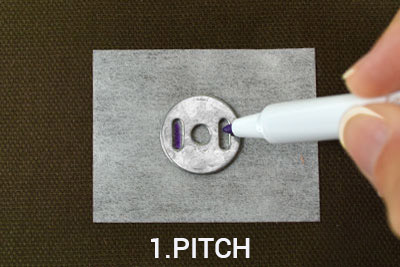
STEP 1:
Apply interfacing to the wrong side of your fabric where the snap will be positioned. Place the metal support of the snap on the interfacing and mark its placement.
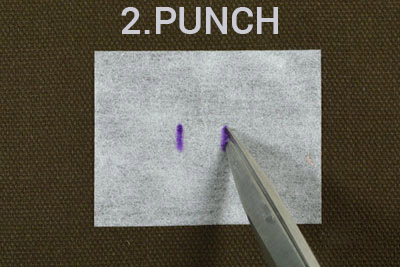
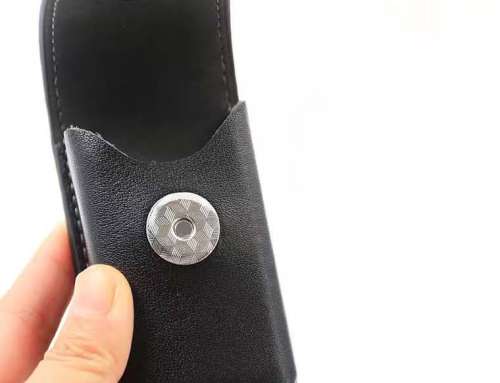
STEP 2:
Insert the prongs through the slits from the right side to the wrong side of the fabric. TIP: For added support on totes and purses, add a layer of cardboard as shown before you put the prongs through the metal support.
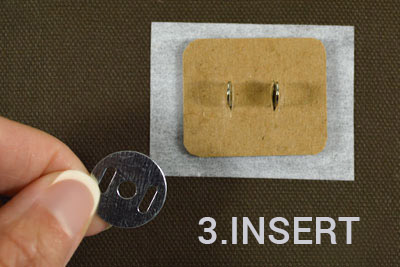
STEP 3:
Insert the prongs through the slits from the right side to the wrong side of the fabric. TIP: For added support on totes and purses, add a layer of cardboard as shown before you put the prongs through the metal support.
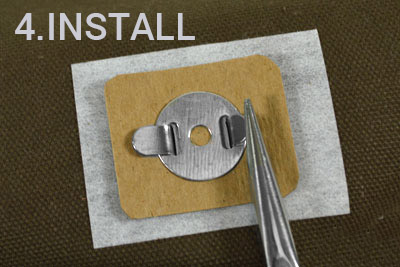
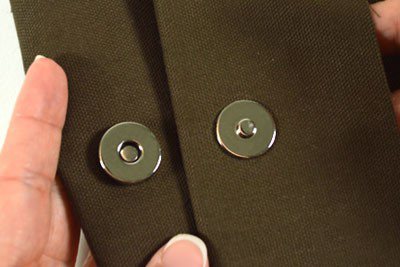
STEP 4:
Put the prongs through the metal support and use pliers to bend the prongs down flat. Prongs can be bent toward the center of the snap, or outward as shown.
STEP 5:
Repeat the process for both sides of the magnetic snap, and voilà – you’re done! Now you can finish constructing your bag, tote, purse or backpack.